Showing posts with label homemade. Show all posts

Wednesday, May 22, 2013

DIY Foaming Body Wash

After pulling out a new bottle of body wash, inspiration hit, & I decided to have a go at making foaming body wash.  Much like foaming hand soap or dish soap, this helps your soap last longer & save some cash. 

Simply take your chosen your body wash & an empty foaming soap bottle, 


Pour between 1/4 and 1/3 full of body wash, fill the remainder with water.
 

Combine, & voila, you have foaming body wash, which works just as well as the regular stuff.  This is quite possibly one of the easiest ways to go green & save some green, I highly recommend it.

Tuesday, April 23, 2013

Happy 1st Birthday Harper Girl!


Our little Happy turned 1 on the 14th & we had an absolutely wonderful day.  

Harper girl showing she's one, sitting in the rocking chair I had as a child, & wearing a beautiful Baby Gap dress I got at a garage sale for $1-- my idea of a perfect trifecta.

We woke up, went to church, Harper screamed her head off in the nursery (that part was not wonderful), came home & had a lovely party with good friends, my gram, & Aunt Sandra. 


The only problem with having the party immediately after church was Harper was completely exhausted, so while we had pizza, Harper girl snoozed away.   


Eventually she woke up & really enjoyed herself.  She LOVED her cake & played with all of her presents just as soon as Emerson opened them.  


 I made Harper's cake & bear print cupcakes, & was pretty pleased with how they turned out.  Aside from our usual, homemade decorations, I decorated our mantle & china cabinet in the dining room with bears, bear books, & the boxed set of Winnie The Pooh books we gave Harper. 


We gave Harper a "Harper sized" doll &  I knitted it an accompanying doll blanket that matches the blanket I knitted her before she was born (pictured above).

It was a beautiful day to celebrate our happy Harper girl & we are certainly blessed to call her ours!

Tuesday, September 11, 2012

Make Your Own Foaming Dish Soap

After seeing the exorbitant price of foaming dish soap in the store, I figured I could make the same thing for much cheaper.  I use dish soap samples, which makes the soap completely free, & a few pumps work just as well as a squirt of regular dish soap. Yeah!  Here's how to make it:  


Simply take an empty foaming soap dispenser & your dish soap. (The same method can be used to make hand soap, just replace the dish soap with hand soap.)


Fill 1/4 of the pump with soap & fill the remainder with water.  Gently mix together.


Voila, you have foaming dish soap! Just add a few pumps to a sink of dishes & you're good to go.  Look forward to long lasting bottles of dish soap & fewer trips to the store!

Tuesday, July 31, 2012

Natural Fever Reducer

Source

Emerson's currently sick & last night her fever spiked to103.7 & she was maxed out on fever reducers.   Feeling desperate, I remembered an article I read suggesting onions could draw down a fever, & figured it was worth a shot.

I simply cut the onion in half, put the cut side on the bottom of her feet, & covered her feet with socks to keep the onions in place.  Within 15 minutes E's fever was down to two degrees & her room smelled like a burger joint.

Of course this remedy requires a compliant patient; not one who freaks out & pulls off the sock/onion combo within a half an hour.  Regardless, if you're looking for a fast, natural way to draw down a fever, try the onion method.  It definitely seemed to work.

Wednesday, July 25, 2012

Storing Up For Winter


One of the many wonderful things about summer is the bounty of produce.  We try to eat seasonally, so in the summer, while produce is at the peak of freshness I like to prep & freeze as much as possible for the winter.


When strawberries were on sale for $0.99/lb I went a little nuts & bought 10 lbs to be prepped & frozen.  The frozen fruit isn't so fabulous on its own, but they're delicious in cereal, yogurt, or smoothies. 


Though it's a lot of work, it's nice when the pickings are slim in the winter to be able to walk out to our freezer & taste the freshness of summer.  Plus, the work is much more fun when it's overseen by the happiest little sous chef in town!

Wednesday, March 21, 2012

Frugal Experiment: Cooking Dried Beans in the Crock Pot

I have long heard that cooking dried beans is more economical than buying canned beans.  Approximately 95% of our meals are vegetarian & we go through a lot of beans in a month, so when I recently found packages of black beans for $0.30/lb I figured it might be a worthwhile experiment. 


Simply sort & wash the beans.  


Find a recipe, pour beans, water, & seasonings in the crock pot.  


Cook overnight or approx 8 hours, drain (if desired), package, & freeze.  Piece of cake!

Here are a few things I learned from my little frugal experiment:
  • Do not overlook the importance of sorting & rinsing the beans before you cook them. You won't save any money using dried beans if you need expensive dental work to repair a chipped tooth from an overlooked rock.  Emerson & I sorted our beans while watching a movie, & she thought it was the greatest thing ever.  
  • Aside from water to bean measurements, you don't necessarily need a recipe. I decided to double & loosely follow this recipe, but my beans ended up too spicy for E, so I can only use them for chili or other foods that she wouldn't normally eat.  Major bummer.
  • If you do find a great deal on dried beans, STOCK UP!  I only bought two 1 lb packages of beans because I hadn't tried cooking with dried beans before.  I am now chock full of cheap bean regret.  Chock full.
  • Unless you find a fabulous deal on dried beans, this might not be the most economical choice for you.  The Simple Dollar does an in depth cost analysis of dried vs. canned beans, but from my experience,  unless I find a fabulous deal, I cannot buy dried beans cheaper than I can canned.  
I'm definitely pleased I tried cooking with dried beans, & hope to again in the near future...as long as I can get a good price.  

Friday, March 16, 2012

Homemade Butter in a Mason Jar

Recently, I purchased some cream for potato soup & while contemplating what to do with the remaining cream, I remembered making homemade butter with my gram when my sisters & I were little.  
Don't mind the crap photo, JC had our camera & I had to use my cell.  Apologies. 
It was SUPER simple & quite satisfying.  I used this tutorial as a rough guide (I didn't wash the butter or salt it), filled two small mason jars halfway, & shook the dickens out of them.  I did the shaking while watching Lord of the Rings & it took me from the beginning of the movie until Frodo was running to Buckleberry Ferry @ The Inn of the Prancing Pony.  For you non-LOTR nerds, I would approximate it was a good 15 minutes of shaking.


The cream separated into butter & a lovely buttermilk, which I poured off & collected for the following morning's pancakes.  Both the pancakes & the butter were delicious & it was such a good use of something that often spoils.  If you've never tried making butter it's a fun arm workout & has tasty results.  Plus, how many people churn their own butter anymore?!  You could be one of just a few!

Happy churning!

Thursday, March 1, 2012

Sewing Marathon Results

I'm a terrible seamstress.  Just terrible.  It took me an extra week to make my 8th grade pillow in Home Ec.  Thank God I don't live in a time when I would be responsible for sewing absolutely everything we need. 

That being said, I have found that minimal sewing is essential to our little frugal life.  Today I spent the better part of the day sewing with some extra flannel we had, & here are the results:


I made 7 cloth diaper doublers, 16 cloth wipes, 10 cotton ball replacements, & 6 flannel breast pads.  Hopefully this will go a long way toward helping once Little Baby arrives & we have two babies in cloth diapers & I'm nursing. 

I'm happy to say that all of the above didn't cost us a dime, but I am very thankful I don't have to do this every day.  Seriously.  

Tuesday, February 28, 2012

Stain Removal for Lazy People

I'd like to say that Emerson is the largest contributor to the stains we have on our clothing, unfortunately that is not the case.  I will forever be the girl who can't wear white without spilling on it.


Case in point:  This lovely little red stain caused by Crystal Light.   Fortunately there's a simple solution. 

Simply remove the garment as quickly as possible.  Rinse in very cold tap water, squirt with a little dish soap, & briefly rub the soap into the stain.  In this case I had some regular Palmolive, but in my experience most dish soaps work.


Then soak the garment in very cold, soapy dish water.  Get on with your day...


Come back in a few hours & like magic, the stain is gone.  I have no idea how it works, but I swear this is the cheapest & easiest way I've found to remove a whole host of stains.  Easy, peasy. 

Monday, February 27, 2012

Freezer Cooking: Breakfast Burritos

I'm currently trying to stock our freezer with meals for when Little Baby arrives & I have no time to do anything besides nurse our newborn & take care of our toddler.  In anticipation of that blessed event, I made some breakfast burritos that are a variation on the Simple Dollar's recipe
 

I scrambled a dozen eggs & thawed & cooked 2 bags of pre-chopped onions & peppers. While the peppers were cooking, I also drained & rinsed a can of black beans. 

**Side note, if you are using frozen peppers & onions & have a lot of excess moisture, don't throw it away!  Drain it off & add it to your homemade stock.  It's super yummy & free!  


Assemble burrito:  eggs, cheese, a spoonful of beans, some peppers & onions, & some salsa if desired.  (I found the salsa made the tortillas a little on the soggy side, but maybe that's just me?)


Wrap burritos in saran wrap or foil, bag, label & freeze.  To thaw, unwrap, microwave for a minute or two, and voila, you have breakfast!

I was able to make these rather cheaply, so here's my cost breakdown using Aldi ingredients, unless specified:

12 eggs--99 cents on sale @ Walgreens
12 tortillas--99 cents
1 can of beans--55 cents
1 cup of cheese-- 44 cents
Salsa--Free (Thanks Gram for sharing your canning!)
Peppers & Onions--46 cents (approx)

Total:  $3.43 or  $0.29 each

Nothing like a healthy breakfast you can eat with one hand while nursing a baby!

Monday, February 13, 2012

DIY Fabric Softener

I haven't bought fabric softener in months.  We've run out of the Downy I bought several years ago for $0.99 a bottle & have just been making do without softener or  a splash of vinegar as necessary.  While I haven't have any trouble with static I must admit I do miss the smell of softener on our towels & sheets, but I figured I wouldn't buy any unless I could get it for under $1 after sales & coupons.

Then I read the following DIY Fabric Softener on HillBillyHousewife.com & figured I'd try it out:

3 c vinegar
2 c hair conditioner
6 c water

While this recipe looked great, it was a little large for me, so I used this recipe conversion calculator to reduce the amount down.  

I used hotel samples of conditioner that smelled like heaven, but were rather thin & after draining them in a funnel overnight ended up with 1/2 cup of conditioner.  


 While measuring the  1 1/2 cups of water, I funneled a little into each bottle so I could shake the remaining conditioner loose & not have any go to waste.

I then added 3/4 c of vinegar & poured all of it into a mason jar.  Shake the mixture until it is evenly incorporated & voila, you have homemade fabric softener!  I found an old measuring cup from coffee & intend to use that small amount (approx 1 T) per load as we have a HE washer. 

I'm not certain that this is the most economical recipe, but if you happened to have free conditioner on hand then this is a great solution. Add this to some homemade laundry detergent & you've got a frugal laundry habit! 

Happy washing!

Wednesday, December 7, 2011

Homemade Christmas--Buggy Blanket

Bug & her beloved Purple
Our little Doodlebug LOVES her blanket.  I'm not a fabulous knitter, but I knitted her two while I was first pregnant.  One sort of fell apart, and the other, which is more the size of a shawl than a proper blanket, is Emerson's absolute favorite.  She calls it purple & cannot stand to be away from it.  I unfortunately learned this the hard way when we forgot to bring it to the Museum of Sciences in San Fransisco & she had a total melt down hissy fit.  Seriously.  Rolling on the floor screaming.  We were those parents unable to control their child.  You're welcome, society. 

In the hopes of creating another blanket for Bug to love I decided to knit her a brand new blanket for Christmas. I tried to do this as frugally as possible, so I deconstructed the first blanket I made her.  I then used a Michael's giftcard from my FIL & paired that with weekly 40% off coupons to gather materials as cheaply as possible.  And today, after what seems like forever, I finally completed the project. 

Bug's blanket folded in half
I also decided to use up the remaining scrap yarn & I made it into a little baby doll blanket.  I'm hoping she'll be satisfied carrying the little doll blanket so we won't have to lug around old purple or new purple when we go to museums, but we shall see.   


Either way, I'm proud of myself.  It took a lot of time & it's not perfect, but I'm so happy to be able to give Emerson something that I made with my own hands this Christmas.  Now I just need to start knitting a blanket for Little Baby as well...

Wednesday, October 19, 2011

So Long Slippery Socks

We have hardwood floors throughout our home.  They're beautiful, but slippery, and Emerson is constantly falling down while she's scurrying around.  As we're transitioning from barefoot to sock weather, I started thinking about grippy socks & I figured I could make my own, inexpensively with puff paint.  


I simply took puff paint & applied 6 little dots to the bottoms of each of Emerson's socks.  She tried them out today & didn't fall down once! 


For $1.19 I was able to take all of Emerson's socks from slippery to grippy in no time.  A much cheaper solution than purchasing a new sock wardrobe. 

Tuesday, October 11, 2011

45 Uses for Vinegar + 31 Uses for Baking Soda

Vinegar & baking soda are some of my absolute favorite products to use around the house.  I use vinegar as a fabric softener as well as a cleaner.  I use baking soda in place of  to scrub our pots, sinks,  &  our tub, & I always sprinkle a little in our diaper pails.  Both products are cheap, environmentally friendly, & easy to come by. 

tajagroproducts.com  
 So I was pleased to find that both were capable of much more than I had ever dreamed.  Check out 45 uses for vinegar (I can't wait to try 22, 24, & 25)


And 31 uses for baking soda--I'm going to have to remember number 17!

I'll never look at vinegar & baking soda the same!

Sunday, March 6, 2011

Beauty Thy Name Is Yogurt

Earlier in the week I experimented in making homemade yogurt.  It did NOT go well.  Not. At. All.  I was depressed I had wasted so much organic milk.  I was sad that my sheer determination alone did not make my yogurt thicken.  It was disheartening to say the least. 

After a few days recovery time, I figured I would give it one last shot before asking for a yogurt machine for my birthday.  I didn't take pictures of everything because I was too embarrassed of sharing my failure with the world for a second time, but here's what I did  (This is a take off of the instructions found here):


  1.  Plug your Crockpot in and set to low while you get everything together...just forget about it for now.

2.  Measure out your milk & put it on the stove top on medium heat.  I used 8 cups of milk this time, because I didn't want to have to make it again quickly if it was successful.  You can either make 4 cups or 8 cups at a time using this method.


3.  Heat your milk, stirring occasionally until it is thick and frothy and 190 degrees.  Here is where I think I made one of my mistakes the last time...having never used a candy thermometer before I hooked it on the side of the pot & assumed it was getting an accurate reading.  In actuality it was touching the bottom of the pan, MAJOR PROBLEM.  Make sure you are just taking the temp of the milk and DON'T touch the bottom of the pan, or, you will have a depressing yogurty mess on your hands.


4.  Once milk has reached 190 degrees, remove from heat & place in cold water in your sink.  Do not fill your sink too full, the pan will float & make you nervous (or it did me).  A few inches should do it.

5.  Measure JUST THE MILK TEMP, and once it is down to 100 degrees remove a cup of the warm milk and set it aside.  The rest of the milk can be poured in to your warm Crockpot.  (Keep the heat on low just a few minutes longer).


6.  Pour your cup of warm milk into a wee bowl, and whisk in your yogurt.   You need to use 2 Tablespoons of yogurt/4 cups of milk, so I used 4 tablespoons (approx 1/2 c) of Stonyfield Organic Yogurt.  Make sure to thoroughly incorporate the yogurt with the milk here & make sure your store bought yogurt says LIVE ACTIVE CULTURES somewhere on the packaging.

7.  Once your bowl is well mixed, add the bowl of yogurt & milk to the crockpot of warm milk. Again, make sure to thoroughly whisk it all together.  Your yogurt and milk need to bond and become BFF.

Ok, here's where I used Sofya's, of The Girls' Guide to Guns & Butter's, method.  Girlfriend knows what she's talking about when it comes to yogurt & she's such a believer in making your own that she emailed me with tips to encourage me along this journey.  Give her blog a little love if you're interested.


8.  Turn off your crockpot, cover with a heavy towel, and put it in your oven with the oven light on. 

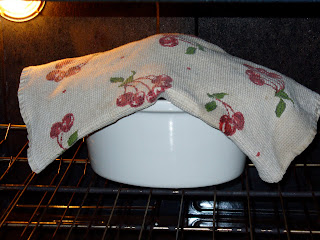
Photo Credit:  GirlsGuidetoButter.com
That's Sofya's crockpot above.  I put the whole thing in the oven, crock & the outer portion.  I'm still not sure if you're supposed to remove the crock, but whatever.

9.  Walk away, leave your oven SHUT, and let your yogurt chillax for 8 hours.

10.  After 8 hours hopefully your yogurt will be thick, delicious, and lovely.  Sofya goes ahead & eats it then.  I put my crock in the fridge overnight to thicken more.  It's totally your call.  Also there may be little whey at the top, you can either dump it off, or mix it in.  I just mixed mine in and it tastes great.


Here's a pic of E's breakfast:  Homemade yogurt & her great gram's organic homegrown peaches.

Yum!

Thanks for those of you who encouraged me to try again, and for those of you who have had a negative yogurt experience or would like to try...be brave.  If I can do it, you DEFINITELY can!