My sister gave me this shirt when she was cleaning out her closet. I didn't try it on until I got back to Arkansas, and just didn't like the cut.
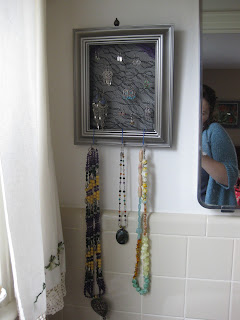
I also had this frame sitting around. It actually belongs to a digital picture frame that JC's aunt & uncle generously gave us; it came with two, and this one has been sitting around ever since. In keeping with the use it, or lose it theme theme this year, I figured I needed to do something with the shirt and frame...like make a framed jewelry holder.
DIY Jewelry Holder Items Needed:
*hot glue gun (how cute is this? $4 @ Michael's!)
*frame
*scissors
*lace
Steps:
1. Cut the lace to fit the frame
 |
| I taped down any excess lace |
3. String up frame--Because this was intended to go on a digital picture frame, it did not have any sort of nail hole, etc, so I had to hot glue a ribbon (saved from a gift) onto the back to secure the frame.
4. Hang & enjoy!
For hanging the necklaces, I simply took a paperclip, unfolded it, and hooked it or the very bottom of the frame. I wouldn't suggest really hanging a necklace from the lace, as I think it would tear the fabric.
My total cost for this project was $0; and, to avoid any waste, the t-shirt has now been cut up for rags. It was an excellent day for repurposing if I do say so myself.
Have you done any DIY projects lately?


pretty! i love this.
ReplyDelete